The On It Studio
Is Your Packaging File Print Ready? A 4-Step Checklist
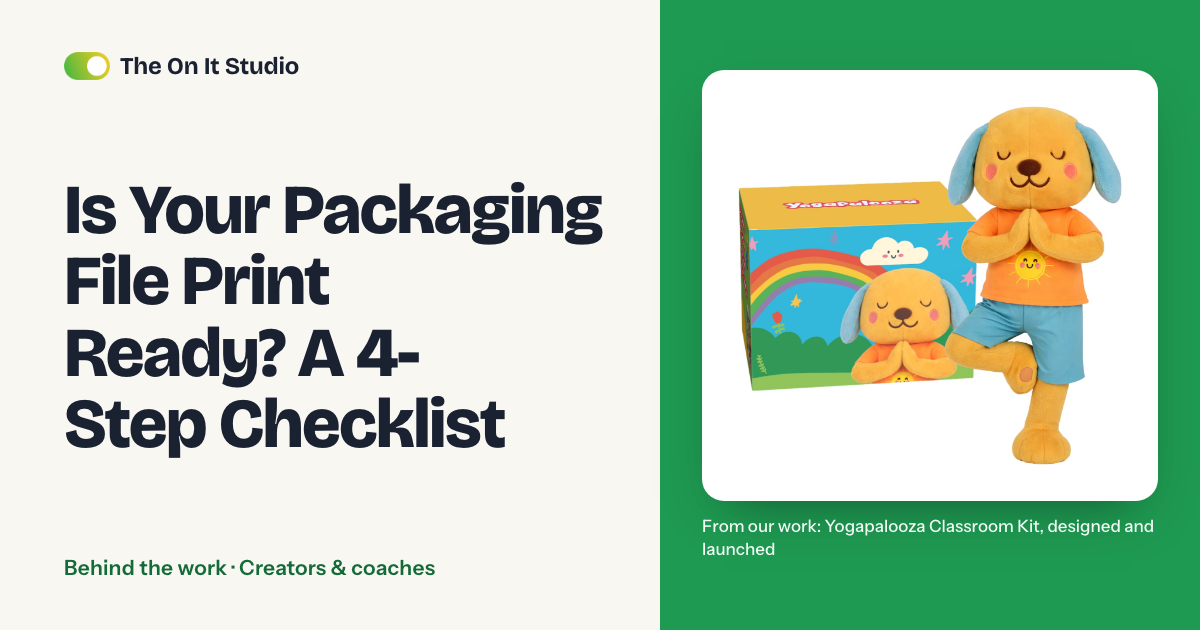
Your files look finished on screen, the printer's quote is in, and you're one email from sending the first run. Before you send it, copy this print ready file checklist for packaging. Your file is print ready once four checks are signed off on a one-page sheet and your printer has confirmed them in writing. Setup takes an afternoon, plus however long your printer takes to reply. The sheet rests on one lesson from taking seven physical products from idea to printed and sold: give every line an owner and a date.
What does a print ready file checklist for packaging cover?
It covers four things:
- bleed and safe margin on every panel
- the finished dimensions against your costed spec
- a named finish for each part
- the printer's written confirmation of all of it
It works the same for a card deck as for a boxed kit.
The numbers on the sheet come from your printer. Each printer sets its own specs, and they change from one product to the next. Get them in writing and build to them.
Why does a first product need a checklist with owners?
The brand was a kids wellness brand: music, yoga and mindfulness for classrooms and families. Its small team had new products, a Shopify store, school partners and live events all moving at once. We took seven physical products from idea to printed and sold for them, among them a kit, a card deck, a book with a plush toy and an audio card. The full story is in the Yogapalooza case study.
Your first product isn't a creative project. It's a checklist with owners and dates. Across those seven products, the creative part of each one was short and the admin around it was long: who owns the file, which printer number applies, who confirms what, and by which date.
The print file sits in the middle of that admin. Your designer finishes it last and your printer judges it first, so it falls between two people. Applied to the print file, that lesson means one line on the checklist, one owner, and a column left blank for the printer's answers. The sheet below is that line, expanded.
For more write-ups like this one, see our behind-the-work posts.
How do you make a file print ready? Four steps
Run the steps in order. Each one ends with a test, so you know when that line on the sheet is done.
Step 1: Get the printer's template and set bleed and margin
Build to the printer's numbers. The cut can shift a little, and bleed stops a white sliver from showing at the edge.
- Email your printer and ask for the template or spec sheet for each item (box, sleeve, card, insert, cover)
- In the same email, ask for their bleed, safe margin, image resolution, color mode and file format, and get the answers in a reply
- Paste the answers into lines 1, 2 and 5 of the sign-off sheet below
- In your design tool's document or PDF export settings, find the bleed option and enter the printer's number. If your printer says 3 mm, set 3 mm on all sides (that figure is only an example, so use your printer's)
- Extend background color and images past the trim edge on every panel, including inside panels and flaps
- Keep text and key art inside the safe margin
- Test it: open the exported PDF and view each panel at the trim line. Anything that stops exactly at the trim edge needs more bleed
When you build files one at a time, it's easy to give the cover bleed and forget it on the inside panel.
Step 2: Match finished dimensions to the costed spec
Your printer priced the quote on one size. If you build the file to another, they'll either query it or print what you sent.
- Open your costed spec and list the finished size of each part (trim size for a deck, width, height and depth for a box, page count for a book)
- Compare each one against the printer's template and the artboard in your file
- Check that the fold, die and cut lines on the template line up with your artwork, panel by panel
- Confirm the version details: SKU, language and barcode placement
- Check the fonts: open the exported PDF on a computer that doesn't have your fonts installed. If any text looks different, outline or embed the fonts and export again
- Test it: ask someone who didn't build the file to read the numbers aloud from the spec, then from the file. Any mismatch goes back to the designer
No costed spec yet? Costing a product before ordering samples walks through building one. If you're making a deck, what a card game print run costs per deck shows how size and component choices change the price.
Step 3: Name the finish for each part
You and your printer can both say "matte" and mean different finishes. Writing each finish down per part closes that gap.
- Make one line per part: box outside, box inside, insert, cards, cover, plush tag
- Write the finish on each line in plain words: coating, lamination, foil, texture, or "none"
- Write "none" on any part with no finish. A blank line means nobody has confirmed it
- Match each line to the sample or proof you're holding. If you don't have a sample of that finish, ask the printer for a photo or a swatch
- Ask how the printer wants foil or spot areas marked in the file, and mark them that way
- Test it: read each line as if you'd never seen the product. If a line only makes sense to you, rewrite it
Step 4: Get the printer's written confirmation
Here's the part nobody tells you: the file isn't print ready until the printer says so in writing. Your checks show the file matches your spec. Their reply shows it matches theirs.
- Send one email listing the finished size, bleed, finish per part, quantity and version, with the files attached
- Ask for a reply that says "confirmed" or lists what to change
- Save the reply next to the sign-off sheet
- Test the barcode: scan it on the printed proof, at final size, with a phone scanner. If it doesn't scan, get it fixed before you approve the proof
- Approve the proof or sample against the sheet before the run starts
- Test it: point to a written line for size, bleed, finish and quantity. If any of them was only agreed on a call, ask again by email
Expect this to add a day or two to the schedule if your printer replies quickly. Waiting for that reply is the cheapest delay in the whole project: it costs you a day, and a missed check costs you the run again.
The one-page sign-off sheet
The eleven lines below roll up into the four steps. Leave the printer's column blank until they answer, then copy their words in exactly. Every figure in that column should come from your printer.
| Check | What to confirm | Printer's answer | Owner | Date done |
|---|---|---|---|---|
| 1. Bleed | On every panel | |||
| 2. Safe margin | Text and key art inside it | |||
| 3. Finished size | Matches costed spec | |||
| 4. Fold, die, cut lines | On printer's template | |||
| 5. Image, color and file | Resolution, color mode and file format per spec | |||
| 6. Fonts | Outlined or embedded | |||
| 7. Finish per part | Named, matched to proof | |||
| 8. Quantity and version | SKU, language, barcode | |||
| 9. Written confirmation | Received from printer | |||
| 10. Barcode scan | Scans at final size on the printed proof | |||
| 11. Proof or sample | Approved |
What does a missed check cost on a first run?
A reprint means paying for the run a second time and waiting weeks for it. On a small first run, both come straight out of your margin.
Take an illustrative run. Say you order 1,000 units at a $4 landed cost per unit (freight already included) and sell them at $18. That leaves $14 of margin per unit, before payment fees and shipping to customers.
If the whole run comes back unusable, the reprint costs 1,000 × $4 = $4,000. That's the margin on about 286 units ($4,000 ÷ $14), roughly 29% of the run, gone before you've fixed anything. On top of that, add an assumed three weeks with pre-orders and launch dates on hold.
Run the same math with your own numbers. Then compare the result with the day or two a written confirmation adds to your schedule.
What should you do this week?
Send the Step 1 email today. Ask your printer for the template and file specs for each item in the run, with bleed and safe margin given as numbers. The email takes ten minutes to write. Their reply gives you the exact numbers to check your files against before you've paid for a proof. For more guides at this stage, see our resources for creators.
The On It Studio is an operations and automation studio. If you're launching your first physical product as a creator, we can run the checklist side of it with you, or you can see the work and send us your week through the free ops audit.
Frequently asked questions
What is a print ready file?
It's a file built to your printer's own template and requirements: their bleed, their finished size and the file settings they ask for. There's no universal definition, so get the spec from your printer and treat their written confirmation as the test.
What is bleed and why does a printer need it?
Bleed is artwork that extends past the trim edge so the finished piece has no blank sliver if the cut shifts slightly. The amount varies by printer and product, so ask your printer for their number and use it.
What should I check before sending a file to the printer?
Check four things: bleed and safe margin on every panel, finished dimensions against the costed spec, a named finish for each part, and the printer's written confirmation of size, bleed, finish and quantity. Put each on a sign-off sheet with an owner and a date.
How do I confirm print finishes before a production run?
Write one line per part naming the finish (coating, lamination, foil, texture, or none) and match it to the sample or proof you're holding. Then ask the printer to confirm those lines by email before the run starts.